Restoring a Family Pet Image

While at Suzanne’s hubby’s birthday party she showed me a picture of their dog,  Zoso.  This picture was their only picture of him as a puppy.  It had been printed on regular copy paper and had a lot of water damage. As she showed me the picture she said, “is there any way you might be able to restore the image”? I seriously had my doubts but decided to give it a try.  She had seen the vintage restoration that I did a few weeks ago and she had more faith in me than I did.

First I scanned the original as a PDF.  Then brought it into Lightroom and did the basic enhancements; bumping darks and balancing whites along with sharpening. Then it was opened in Photoshop so that I could use the various Healing Brush Tools; Patch, Regular Healing and Spot Healing. Then used the Burn Tool to redefine some areas. It was fun using the Healing Brush to build up the puppies hind end. Then the image went back into Lightroom for final touches including a Vignette.  Fun project that only took about 2 hours with much better results than I anticipated.  Suzanne was pleasantly surprised.

Restoring an Old Image

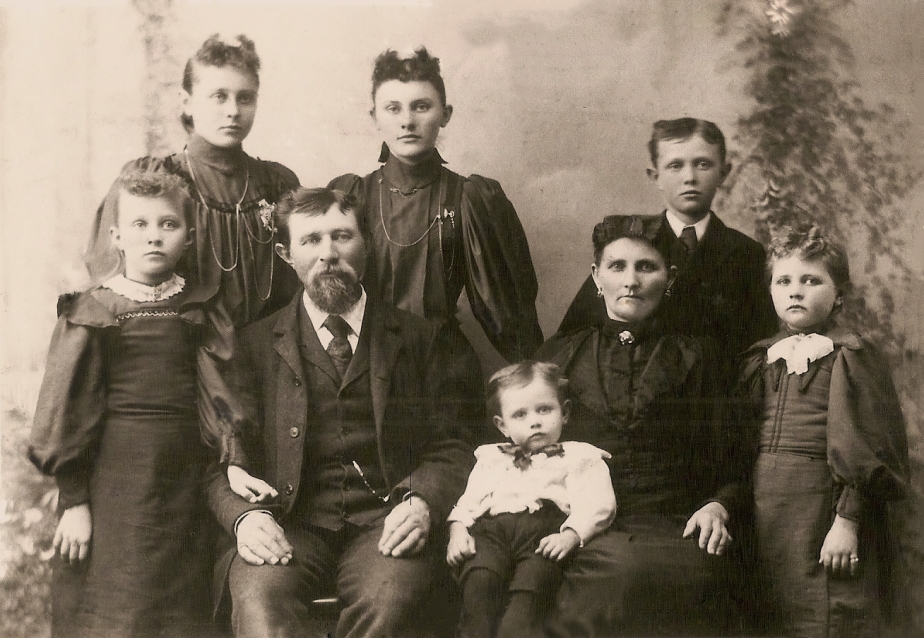
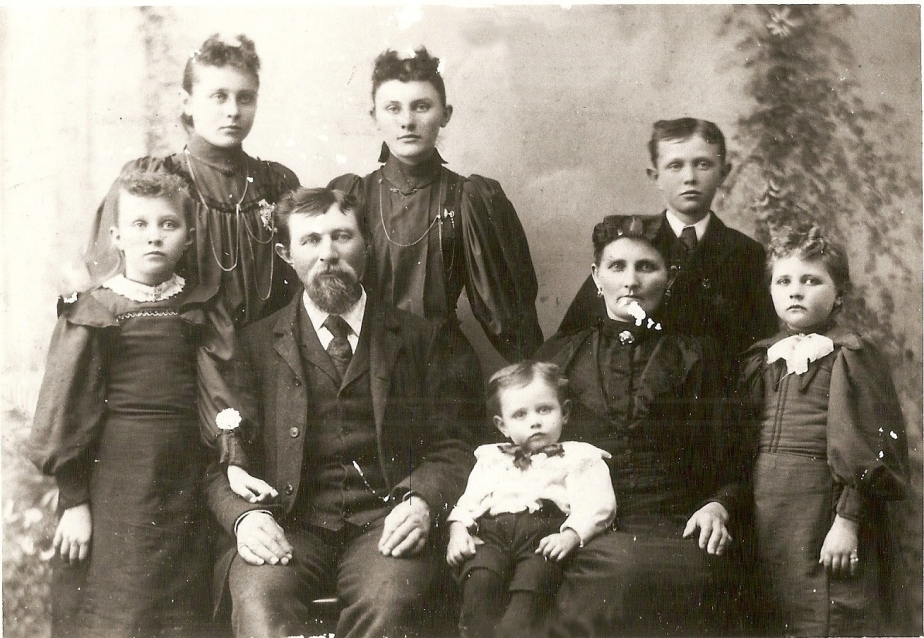
My brother-in-law sent me an old tattered image of his great-grandfather and his family.  He asked if it were possible to restore it and so I took it to task.  It did take some time to put his great-grandmothers chin back on and patch all the missing areas where the paper had worn.  But, the result was much better than I imagined.

Bergman Family SepiaBergman Family - Back L-R - Mary Anna, Katherine, Frank; Front L-R - Magdalena, Bernard (Barney), Lawrence, Caroline (Lange), Johanna

Door Knocker

My good friend, Susan, has been remodeling her guest bathroom and wanted a long vertical picture to hang over the commode.  She brought me a picture of a door knocker that she had taken in Italy.  It was roughly a 12 x 18 picture and she wanted it to be 8 x 23.  We ended up with 10 x 23 but had to grow the wood area of the picture to do it.

View above the Commode

This was done by adding copy paste layers of the wood work at the top and bottom of the door knocker and then merging the layers. The smug tool was used to try to blend in the area where the layers were added, burn tool was used on the knocker itself to enhance it and the colors were enriched.

One Photo Focus – The Cobb by Katie Prior

Katie Prior's Image - The Cobb
Katie Prior’s Image – The Cobb

When I saw Katie’s image it reminded me of my travels, though typically I visit a much warmer location.  However, I always enjoy pictures of the ocean as it breaks against a pier.  I did my typical small changes to the image in Lightroom where the image was cropped, exposure was edited slightly, vibrance was popped up quite a bit along with the blue and aqua in luminance and saturation.  Then the image was brought into Photoshop where mostly I just did a few burns against the mountain area along the water line and then did a new change for me where on a new layer, I used the color replacement tool and picked a light blue to adjust the skyline from gray to more of a blue-gray.  Thanks, Katie for the lovely image and to Stacy for keeping the ball rolling.

Visual Venturing Katie’s Image

One Photo Focus – Robin Kent’s White House

Robin-Kent-One-Photo-Focus-July
Robin Kent Image edited by KChengelis – KCinAZ
Original Robin Kent Image

I didn’t do a great deal of editing to Robin’s already great image. In Lightroom, the image was sharpened and a few changes made to exposure. I tried to bring down the yellow cast in the building and did so a bit. Mostly I cropped the image and removed the people from the foreground grassy area. In Photoshop the blue in the sky was increased using a mask so that the building and grass were not changed. Also, the burn tool was used to deepen the color of the grassy area.

To check out all the other versions, visit Stacy’s One Photo Focus.

WPC-Reward

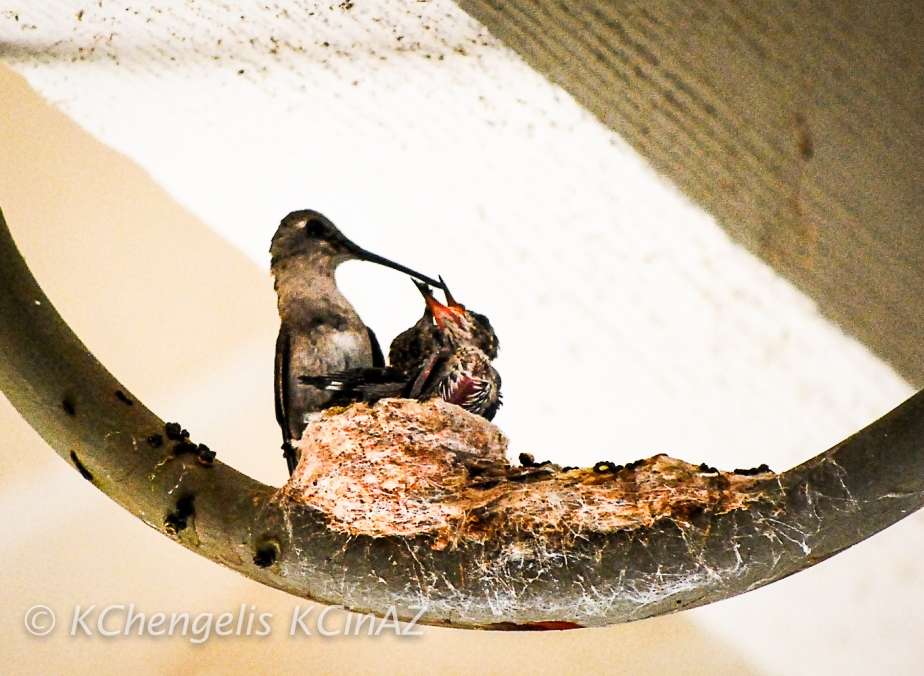
Who is getting the reward in this picture?  The newborn hummingbird getting a meal?  The hummingbird mom who just was rewarded with two little hatchlings?  Or, me for having them perched just above my barbecue? I wasn’t able to barbecue at all that season because of the little babies.  That was three years ago and now they have a nest in another tree by the spa.

I’ve stepped out several times to take a photo of the mother nesting but she is still too timid and immediately flies away.  This time the nest is hidden on a heavily leafed branch and it’s more difficult to get a sharp picture of the mom nesting without the leaves taking away the focus.  I think we can use the spa except that it’s still too cold.

Mamma Hummingbird Feeding Her Young

Stop in here to see other great ideas for Rewards on the Weekly Photo Challenge.

After Before Friday – Cabo Fisherman

Several weeks ago when I posted the after image of the Cabo Fisherman on a weekly challenge, I wanted to send it to Visual Venturing for ABFriday since it has become one of my favorite images. I missed the window of opportunity but wanted to send it this week anyway. I did several changes to the image but the most noticeable were to straighten the skyline after reading and change to a golden color tone. Stop by Stacy’s Visual Venturing and take a peak at other ABF creations.


Cabo Fisherman After
Cabo Fisherman Before - Original
Cabo Fisherman Before – Original


Here is more on what was done.

Lightroom Beginning Step One in Basics:  Adjusted temperature, tones, clarity and vibrance.
Lightroom 5 Beginning Step One in Basics: Adjusted temperature, tones, clarity and vibrance.
Step 2 Detail Tab: A little sharpening and noice reduction.
Step 2 in Detail: A little sharpening and noice reduction.
Step 3 in Lightroom adjusting Shadows a bit and adding a vignette
Back to Basics in Step 4:  Adjustments to tones and Presence.  Increased highlights, Shadows and Whites while decreasing blacks.  Upped Clarity and Vibrance.
Back to Basics in Step 4: Adjustments to tones and Presence. Increased highlights, Shadows and Whites while decreasing blacks. Upped Clarity and Vibrance.
Last Touches in LR:  Eliminated the last of the over exposed whites and final on cropping.
Last Touches in LR: Eliminated the last of the over exposed whites and final on cropping.
Finishing Touches in Photoshop CC2014:  Further straighten of skyline and took skyline off-center.  Used burn tool the line where the last of the wave met the beach.
Finishing Touches in Photoshop CC2014: Further straighten of skyline and took skyline off-center. Used burn tool the line where the last of the wave met the beach. Somehow managed to take all of the vibrant color away but didn’t notice it had happened.

After seeing the various stages as screen prints myself I sometimes wonder why the image changes so much when taken into Photoshop. The colors were much more vibrant in Lightroom and the final image seems dulled out. Second guessing myself.